
Uncategorized
How to Make Wax Melts UK: A Masterclass in Botanical Home Fragrance
Jun
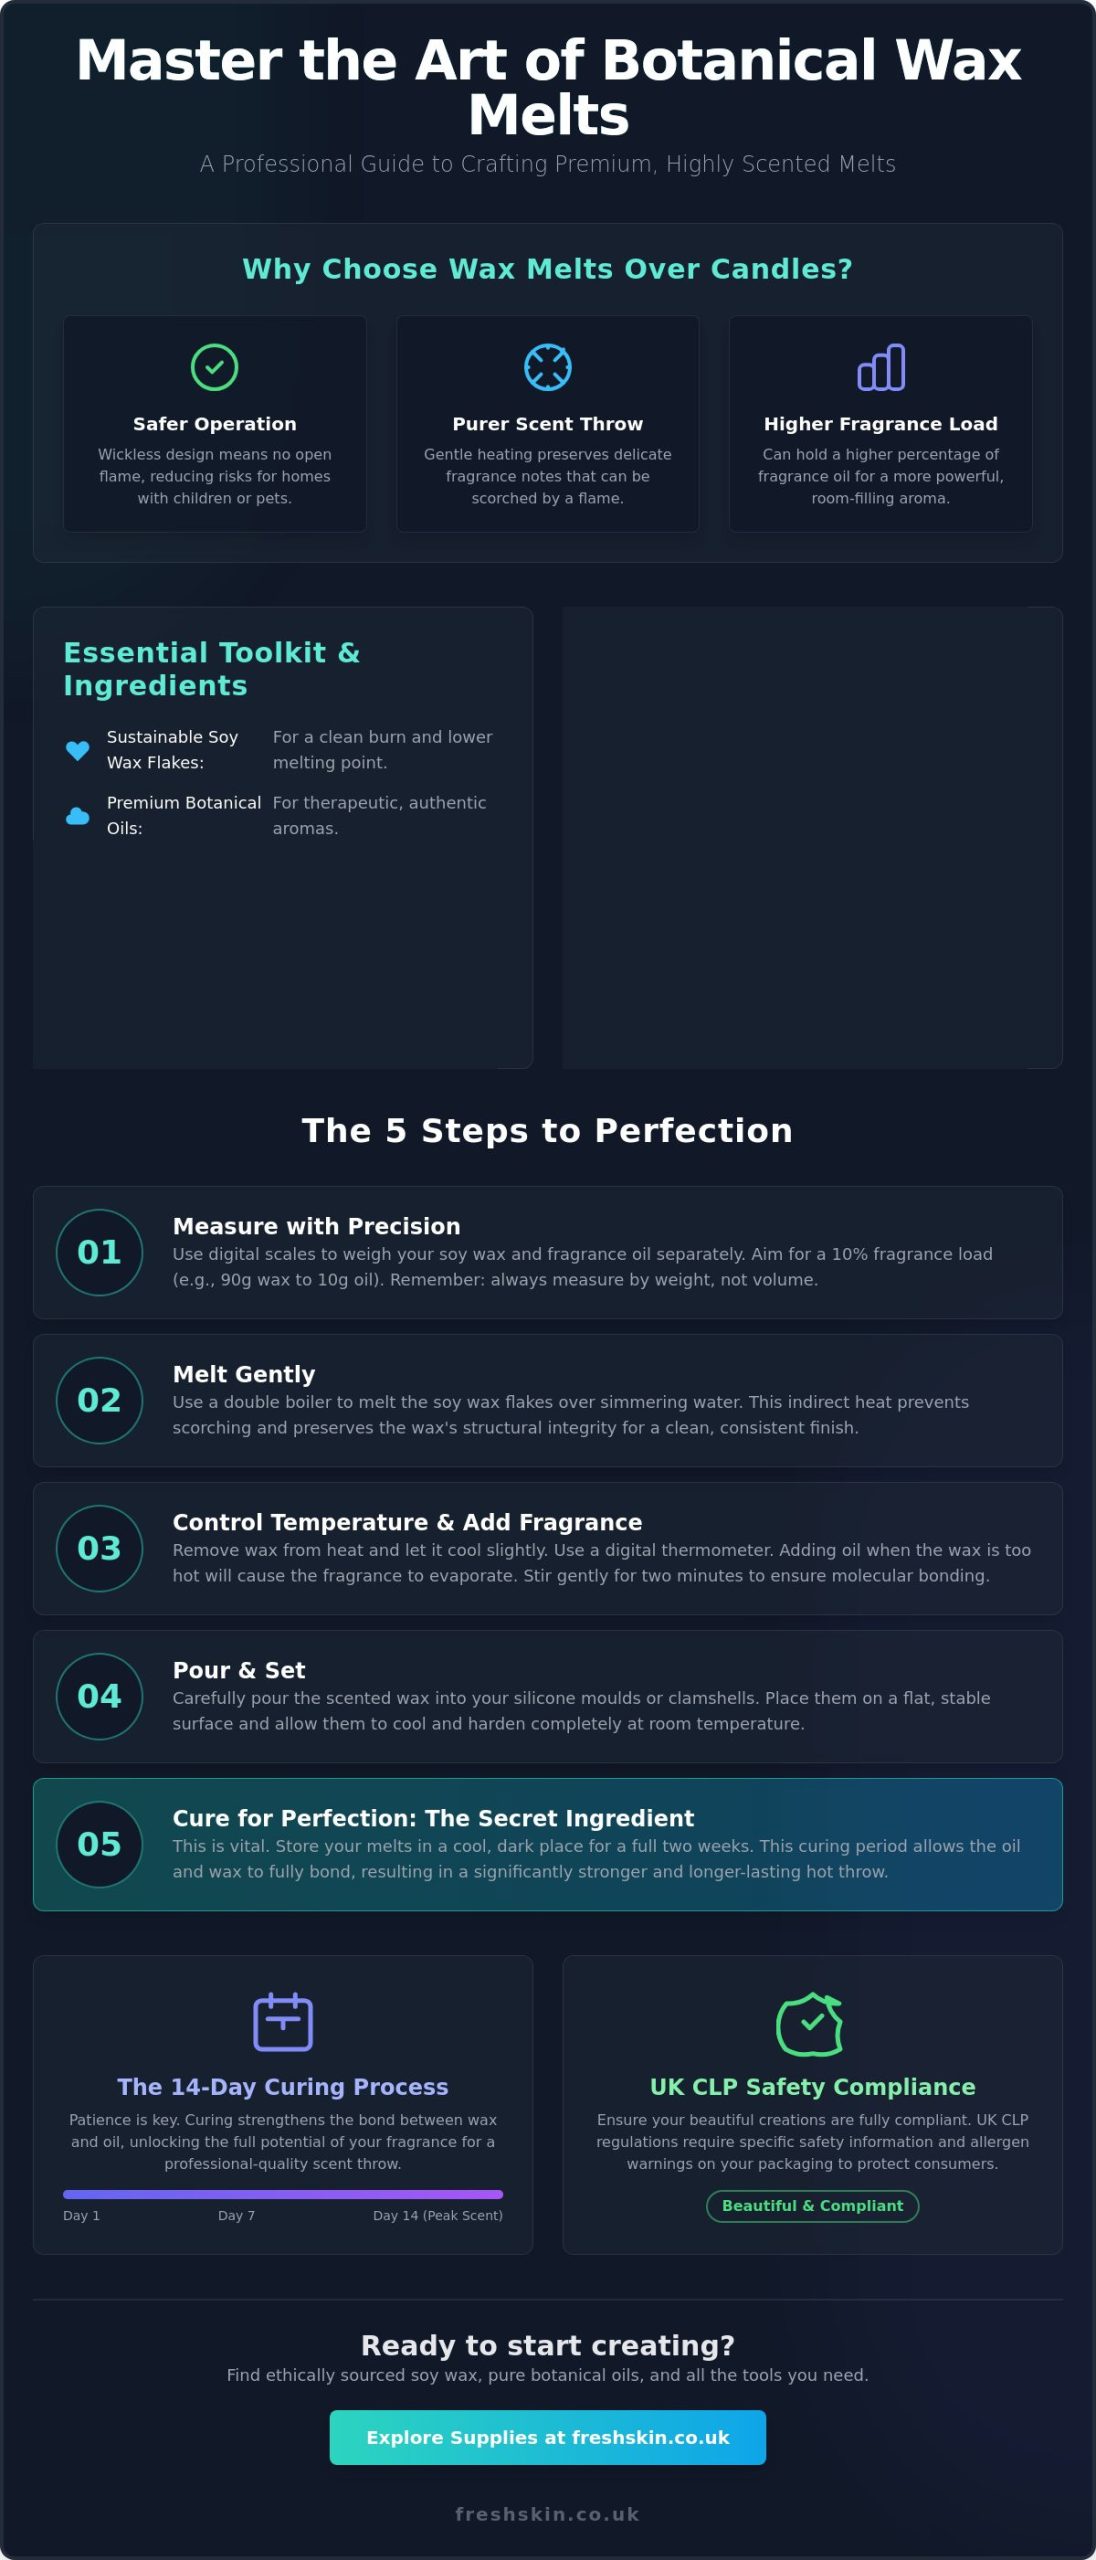
The difference between a hobbyist project and a professional botanical fragrance lies in the hidden science of scent layering and molecular bonding. You’ve likely experienced the disappointment of a wax melt that looks lovely but fails to fill the room with scent, or perhaps you’ve struggled with unsightly frosting on the surface of your soy wax. Learning how to make wax melts UK enthusiasts will truly admire requires more than just a simple melt and pour approach; it demands an understanding of how premium ingredients interact under specific temperatures to create a clean, consistent burn.
We’re here to help you master this craft, turning your creative space into a hub of professional botanical artistry. You’ll discover the exact fragrance ratios needed for a powerful scent throw and gain clarity on the essential UK CLP safety labelling laws that often cause confusion for new makers. This guide provides a clear path to creating gift-worthy, highly scented melts using sustainable soy wax flakes and pure botanical oils. By the end of this masterclass, you’ll have the confidence to produce professional-quality home fragrances that reflect your commitment to quality and ethical sourcing.
Key Takeaways
- Discover why wickless botanical melts offer a safer alternative to traditional candles while preserving the delicate, therapeutic notes of your essential oils.
- Master the professional double boiler method and temperature control to ensure your soy wax flakes maintain their purity and structural integrity.
- Learn the precise science behind the 10% fragrance load to understand how to make wax melts UK enthusiasts will value for their powerful, room-filling scent.
- Understand why a patient two-week curing period is the vital “secret ingredient” for achieving a professional-quality fragrance throw.
- Gain clarity on essential UK CLP safety labelling regulations to ensure your hand-poured creations are both beautiful and fully compliant.
Understanding the Fundamentals: What Makes a Perfect Wax Melt?
A wax melt is essentially a wickless candle. Instead of burning a wick, you place these scented pieces into a warmer, where indirect heat gently releases the fragrance. Because there is no open flame consuming the wax, the process is often considered a safer alternative for households with pets or children. Beyond safety, the real magic lies in how the scent is preserved. When you learn how to make wax melts UK hobbyists often discover that the absence of a direct flame prevents the delicate top notes of a fragrance from being scorched. This results in a cleaner, more authentic aroma that lingers longer in your living space.
The strength of this aroma is what professionals call “scent throw.” This is divided into two categories: cold throw, which is the scent you perceive when the wax is solid, and hot throw, which is the fragrance released during melting. Achieving a powerful hot throw is the ultimate goal of any maker. It’s also a highly cost-effective pursuit. While premium shop-bought melts can be expensive, crafting your own allows you to control the potency and quality of every batch at a fraction of the retail price.
Wax Melts vs. Candles: Why Choose Melts?
Choosing melts over traditional candles offers several practical advantages. First, wax melts can hold a higher fragrance load. While a container candle might struggle to stay stable with too much oil, a wax melt can often accommodate a higher percentage, leading to a more intense sensory experience. You also have the freedom to switch scents effortlessly. If you want Lavender in the morning and Fresh Linen in the evening, you simply swap the wax. There’s no need to wait for a “burn pool” to reach the edge of a jar before extinguishing.
The Importance of Quality Ingredients
The foundation of every great melt is the base wax. While some mass-market products rely on paraffin wax properties for a quick scent release, many botanical crafters prefer soy wax flakes for their cleaner burn and sustainable origins. Soy wax has a lower melting point. This is vital for preserving the integrity of complex oils. Using high-quality fragrance oils or essential oils ensures your home fragrance isn’t just strong, but also therapeutic. Whether you’re using Peppermint Essential Oil for focus or Rosemary for clarity, the purity of your ingredients determines the final finish and the wellness benefits you’ll enjoy.
Essential Equipment and Ingredients for UK Crafters
Building your botanical workshop starts with choosing the right instruments. When researching how to make wax melts UK crafters often overlook the necessity of precision, yet this is exactly what separates a gift-quality product from an average one. You don’t need a massive industrial setup, but a few specific tools will ensure your safety and the integrity of your ingredients. Quality tools are the bridge between a messy kitchen experiment and a professional botanical product.
The double boiler method is your most important technique. By placing your wax in a heat-proof bowl over a pan of simmering water, you ensure the wax never touches a direct heat source. This prevents scorching and preserves the delicate molecular structure of the wax. Alongside this, a digital thermometer is vital. The science of scent tells us that fragrance molecules are volatile; if you add them to wax that is too hot, they will simply evaporate before the melt even sets. To begin your journey with the highest quality materials, you can explore our range of ethically sourced soy wax and essential oils.
Precision scales are another non-negotiable tool. Always measure your ingredients by weight in grams rather than volume in millilitres. Different oils have different densities, so 10ml of Lavender Essential Oil won’t weigh the same as 10ml of a heavier fragrance oil. Using grams ensures your fragrance ratios are perfect every single time, preventing issues like oil leaching or poor scent throw. For the final shape, you can choose between reusable silicone moulds or plastic clamshells. Silicone is a wonderful, sustainable choice for home use, while clamshells are often preferred for gifting as they protect the scent during storage.
Choosing the Best Wax: Why We Use Soy Wax Flakes
We recommend using Soy Wax Flakes for several reasons. Soy is a renewable, vegan-friendly resource that provides a much cleaner burn than paraffin alternatives. Because soy wax has a lower melting point, it holds and releases fragrance more gently, which is ideal for botanical blends. Understanding your specific wax’s melt point is key; most soy waxes require heating to around 70°C before adding scent and pouring at a slightly lower temperature to ensure a smooth, professional finish without frosting.
Fragrance Oils vs. Essential Oils
Choosing between fragrance oils and essential oils depends on your desired outcome. Fragrance oils are specifically engineered for high-heat applications, making them perfect for complex, nostalgic scents like Baby Powder or Fresh Linen. They typically offer a more robust scent throw that fills large rooms easily. Essential oils, such as Lavender or Peppermint, provide authentic aromatherapy benefits but require more careful temperature management. Always check the flash point of your chosen oil to ensure it stays safely bonded within the wax during the melting process.
The Science of Scent: Mastering Ratios and Temperatures
Mastering the chemistry of home fragrance is what transforms a simple craft into a professional botanical art. While it’s tempting to guess your measurements, the secret to a high-quality product lies in the precision of your ratios and the timing of your temperatures. When you’re learning how to make wax melts UK standards require a disciplined approach to ensure your creations are safe, stable, and consistently fragrant. Understanding the molecular bond between your wax and oils is the only way to prevent common issues like “sweating” or a weak scent throw.
Oil bleeding, where liquid droplets appear on the surface of your finished melts, is often a sign of overloading the wax. Every wax type has a maximum saturation point. If you exceed this, the wax crystals simply can’t hold the oil as they cool, causing it to leach out. Similarly, “flash points” are a critical safety and quality consideration. This is the temperature at which an oil’s aromatic molecules begin to evaporate. If you add your oils when the wax is too hot, you’ll lose those precious top notes before the melt even sets in the mould.
Calculating Your Fragrance Load (The Math)
The industry standard for a potent, high-quality melt is a 10% fragrance load. To calculate this accurately, you should always work by weight. For a standard batch, this means using 100g of soy wax flakes for every 10g of oil. While you might be tempted to add more oil for a stronger scent, exceeding 10% can actually be counter-productive. It can lead to poor combustion in tea-light warmers and may cause the wax to become too soft. For particularly potent botanical extracts like Eucalyptus Essential Oil, you might even find that a slightly lower ratio of 8% provides a more balanced and pleasant aroma.
Temperature Control: The Golden Rules
Consistency is your best friend when working with natural waxes. To achieve a professional finish, follow these three temperature milestones:
- The Melt: Heat your wax gently to 75-80°C. This ensures all the natural wax crystals are fully liquid and ready to accept the oil.
- The Bind: Allow the wax to cool slightly before adding your scent at 65-70°C. This range is high enough to allow for optimal molecular bonding but low enough to protect the oil’s integrity. Stir gently but thoroughly for at least two minutes.
- The Pour: Wait until the wax reaches 55-60°C before pouring into your moulds. This lower “pour temp” is the secret to preventing frosting and those frustrating sinkholes that can ruin the aesthetic of your botanical melts.
By respecting these boundaries, you ensure that your hand-poured melts look as beautiful as they smell, maintaining their botanical integrity from the moment they’re poured until they’re finally warmed in a customer’s home.
Step-by-Step: How to Make Your Own Scented Wax Melts
Success in botanical crafting begins with a calm environment. Before you start, ensure your workspace is clean, level, and entirely draught-free. Even a slight breeze from an open window can cause your wax to cool too rapidly, leading to the surface cracking or frosting that we discussed earlier. Once your area is prepared, gather your equipment. Having everything within reach allows you to focus entirely on the delicate process of temperature management and scent integration. This intentionality is what makes the process so therapeutic.
Learning how to make wax melts UK style means prioritising safety alongside aesthetics. A common mistake among beginners is rushing the stirring phase. When you add your oil to the melted wax, you must stir gently but continuously for a full two minutes. This isn’t just a suggestion; it’s a vital safety step. Thorough stirring ensures the oil molecules are completely bound to the wax, preventing concentrated “pockets” of oil that could pose a fire risk when the melt is eventually used in a warmer. Browse our collection of premium fragrance oils and soy wax flakes to begin your botanical crafting journey today.
The Crafting Process in Detail
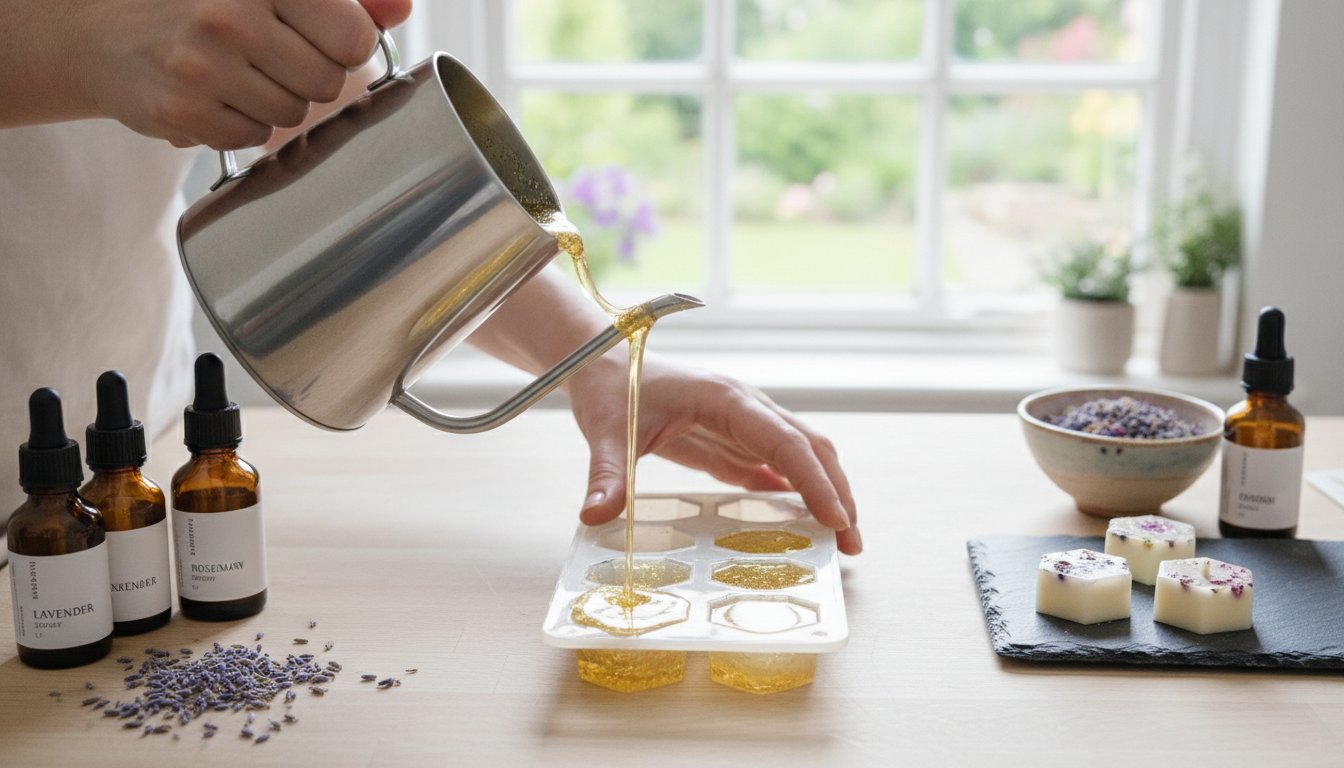
Begin by weighing your Soy Wax Flakes using your precision scales. Place the wax into your double boiler and heat it gently over a simmering pan. You’re looking for the wax to reach a completely clear, liquid stage without any lingering solid flakes. Once you’ve reached your target temperature of 75-80°C, remove the wax from the heat. As it cools to the 70°C mark, add your chosen botanical oil blend. Use a slow, steady motion to stir. When you’re ready to pour, hold your container close to the mould to minimise air bubbles and ensure a smooth, professional surface. Allow the melts to sit undisturbed for at least 24 hours to set firmly.
Creative Flourishes: Botanicals and Colour
Once you’ve mastered the basic pour, you can begin to experiment with visual textures. Adding a pinch of dried lavender buds or rose petals can elevate a simple melt into a gift-worthy piece of art. If you’re using botanicals, place them in the mould before pouring or sprinkle them on top just as the wax begins to turn opaque. For a touch of luxury, a tiny amount of mica powder will create a shimmering, hypnotic “melt pool” when the wax is warmed. If you enjoy creating your own signature scents, using Amber Glass Bottles with Droppers is the best way to store your custom oil blends, protecting them from light degradation and ensuring every drop remains potent.
Curing, Storage, and UK Safety Regulations (CLP)
Your melts might look perfect after their initial 24-hour setting period, but the process of fragrance development is only just beginning. Patience is the final, invisible ingredient in every successful batch. Understanding the nuances of aftercare is a vital part of learning how to make wax melts UK crafters can be proud of. Without proper curing and storage, even the most carefully measured botanical blend will fail to reach its full potential when it finally meets the heat of a warmer.
The Science of the Cure
Curing is the period where the fragrance oil and wax molecules finish bonding. While paraffin waxes cure quickly, soy wax flakes require a minimum of two weeks to reach their peak scent throw. During this time, the wax crystals continue to form and rearrange themselves around the oil molecules, locking the scent deep within the structure. If you test a melt too early, you’ll likely experience a faint, disappointing aroma. By waiting the full 14 days, you ensure the fragrance is released slowly and consistently, providing the high-end experience your botanical ingredients deserve.
UK Safety and CLP Compliance
Transparency is a core value of the botanical community, and in the UK, this is reflected in CLP (Classification, Labelling and Packaging) regulations. These rules are designed to keep your home and your loved ones safe by providing clear hazard information. Staying informed on the latest standards for how to make wax melts UK wide ensures your hobby remains a source of joy rather than stress. A standard CLP label must include:
- Product Identifiers: The name of the scent and the specific chemicals that triggered the classification.
- Signal Words and Pictograms: Standardised symbols that indicate potential hazards, such as the exclamation mark icon.
- Allergen Lists: Specific ingredients that may cause allergic reactions.
- Contact Information: Your name, address, and phone number so you can be reached in an emergency.
Once your melts are cured and labelled, store them in a cool, dark place. Exposure to direct sunlight or fluctuating temperatures can cause the delicate botanical oils to degrade, leading to scent fading or discolouration. When you’re ready to enjoy them, ensure your wax warmer is clean and free from old residue. A simple way to clean your warmer is to let the wax cool slightly, then pop the solid disc out with a gentle nudge. Alternatively, use a cotton ball to soak up liquid wax before wiping the dish with a soft cloth. This ensures every new scent remains pure and untainted by previous blends.
Elevating Your Botanical Craft
Mastering the art of botanical home fragrance is a rewarding journey that blends scientific precision with creative expression. By focusing on exact temperature control and respecting the vital two-week curing period, you ensure every melt delivers a clean, room-filling scent throw. Understanding how to make wax melts UK enthusiasts will love is about more than just melting wax; it’s about choosing ingredients that align with your values of quality and purity.
As a family-run UK business since 2010, we’re dedicated to supporting your crafting journey with directly sourced, high-purity botanical oils. Whether you’re making a small batch for your home or preparing gifts for loved ones, having the right supplies is essential. You can explore our premium range of Fragrance and Essential Oils for your next batch and enjoy fast UK delivery on all your crafting essentials. We’re excited to see the beautiful, aromatic creations you’ll produce as you continue to refine your skills in this therapeutic craft.
Frequently Asked Questions
Why do my wax melts have white frosty patches?
Frosting is a natural characteristic of vegetable-based waxes like soy and doesn’t affect the quality or scent throw. These crystalline structures appear on the surface as the wax cools and resets. To minimize this effect, try pouring your wax at a lower temperature and ensure your moulds are kept in a draught-free environment with a consistent room temperature. This helps the crystals form more uniformly during the setting process.
How much fragrance oil should I add to 100g of soy wax?
You should add 10g of fragrance oil to 100g of wax to achieve the industry-standard 10% fragrance load. This ratio provides a powerful, room-filling aroma while maintaining the structural integrity of the wax. Always measure both your soy wax flakes and your oils by weight in grams rather than volume. This precision prevents the oil from leaching or “sweating” out of the finished melt, ensuring a professional finish.
Can I use essential oils instead of fragrance oils for wax melts?
Yes, you can use pure essential oils like Lavender or Peppermint to create melts with authentic aromatherapy benefits. These botanical extracts provide a cleaner, more therapeutic experience than synthetic alternatives. However, essential oils are more volatile and have lower flash points. You must add them to your wax at a slightly lower temperature, usually around 65°C, to prevent the delicate aromatic molecules from evaporating before the wax sets in the mould.
How long do I need to let my wax melts cure before using them?
Soy wax melts require a full two-week cure to achieve their maximum scent throw. During these 14 days, the wax crystals continue to form and stabilize around the fragrance molecules, creating a much stronger bond. While it’s tempting to use them sooner, testing a melt too early often leads to a disappointing aroma. When learning how to make wax melts UK crafters find that this patience is the secret to professional results.
What is the best type of wax for making melts in the UK?
Soy wax flakes are widely considered the best choice for botanical melts due to their sustainable origins and clean-burning properties. This wax is a renewable, vegan-friendly resource that holds fragrance exceptionally well. Its lower melting point compared to paraffin makes it ideal for preserving the integrity of essential oils. Most UK hobbyists prefer soy because it produces a smooth, creamy finish that aligns perfectly with a natural, health-conscious lifestyle.
Why is there no smell coming from my wax melt when it heats up?
A weak scent throw usually happens if the fragrance was added to the wax when it was too hot, causing the aromatic molecules to “flash off.” It can also occur if the melts haven’t been allowed to cure for at least two weeks. If you are mastering how to make wax melts UK standards, ensure you are using high-purity oils and monitoring your temperatures with a digital thermometer to prevent the scent from escaping during production.
Do I need a special license to sell wax melts in the UK?
You don’t need a specific manufacturing license, but you must strictly comply with UK CLP (Classification, Labelling and Packaging) regulations. This is a legal requirement that involves labelling every product with specific safety information, allergen lists, and hazard pictograms. It’s also vital to have product liability insurance if you intend to sell your creations. These steps ensure your botanical business remains transparent, legal, and safe for all your customers to enjoy.
How do I clean my wax warmer after the scent has gone?
The most effective way to clean your warmer is to soak up the liquid wax with two cotton balls once the fragrance has faded. Simply place the cotton balls into the warm pool, allow them to absorb the liquid, and then wipe the dish with a soft cloth or paper towel. This method is far safer than using a sharp object to scrape out cold wax, which can easily scratch the ceramic or damage the heating element.